When you see this ![]() icon, you can click on it to return to this point.
icon, you can click on it to return to this point.
We use a 3-button mouse with several functions. The location of the cursor driven by the mouse brings focus, i.e. directs keyboard characters to the appropriate window. You simply place the mouse cursor (looks like a capital I) on the window you want to work in. Often, if nothing happened after you typed a command, it was because the mouse was not in the right window. A simple action you can achieve is to click with the left button on a window just about anywhere on it, except on the little boxes at top right: that brings it to the foreground. Other actions, such as clicking, dragging to select, and inserting, are standard X. The vertical bar on the left of each window is the scroll bar. At the top margin of each window is a bar; clicking a mouse button there once results in one of these actions:
Caution: clicking the left mouse button twice on the bar shrinks the whole window into the bar; repeating that on the shrunk bar restores the window.
Before starting the rtsystem, make sure the guide system is up
and running on the guide PC. The TV camera and gain boxes stay
powered on at all times. Keep the TV gain turned down until you
are on the sky.
See the docs on the new guide tv system for more
info. Use gain = 2.1, or try blev=30, wlev=130, gain=2.5, 32
frames. Try values of 1 blev=40 wlev=90 gain=2.3 for higher
contrast, avg 32 frames. Built-in settings are also available;
a likely winner for you is "FAST dark".
To start the FAST system, mouse the
cursor over to the Main Login window and type
The Telshell window accepts all commands for system control
of the CCD, telescope, rotator and guider. It has the basic functions of
tcsh (command line editing) as well as custom functions. It also has
commands built-in to control the telescope, cal lamps and mirror,
rotator position and guider functions, which duplicate many of the TCS
functions.
The images are stored in a directory named /rdata/fast/YYYY.MMDD, for example
/rdata/fast/2006.0917 for 2006 Sept 17th. The directory changes and
appears automatically at 12 noon. Data are stored as FITS files
(without extensions). There is a local storehouse of data files that reside at
/faststore, for example /faststore/2006.0917. Every morning at ~8:30 AM the
files from the last nights data directory are copied into the /faststore
directory. Data are also transfered after that to storage on disk in Cambridge.
Two or more Telshell commands may be concatenated in a single line
by typing them in succession, separated by a semicolon. Not all commands are suggested for use this way, as some commands like total will return and move
to the next command before completion.
There are only a few commands you need to know to take and
look at an exposure:
Basic commands
Four windows will appear:
The fast.err window contains the error debugging output for all processes.
It may be useful if problems occur, but you may iconify it for now.
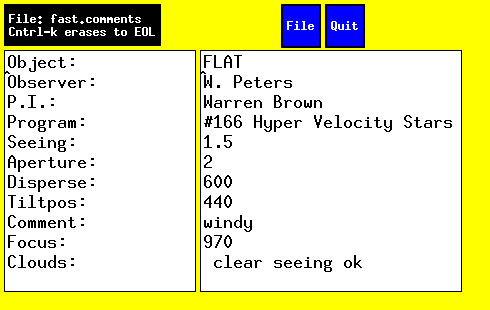
Comment Editor
The comment block can be edited by typing the command comment.
Here's how the comment-editing window appears:
***NOTE: Please keep the comment fields updated to include correct
grating, tilt, and slit for the headers!!!***
How to observe with FAST
0. Before taking any images, from the iraf session enter the initlog
command to set the Date and Page Number in the logs. This is
required to ensure proper logs are generated. You can then view
the log for the current night with the iraf command "viewlog" at
any time. You can also epar qfast at this time.
1. To take FLAT and BIAS exposures for the standard 300-gpm, 3" slit
combo configuration, in the telshell, type "dobfx2x4-300" which
is aliased to "source ~/scripts/dobfx2x4-300" and takes 10 (10) BIAS
and 21 (10) FLAT exposures with binby2 (binby4) in about 15 minutes.
To take flats for other setups, turn on incand, move sky/comp to
comp, and type "repeat 10 flat time". Remember to turn off the
incand lamp when done! To take only biases, "bias 10" will yield
10 BIAS files. Each night, check your calibrations to make sure
they are normal (see the checklist).
Here is a binby2 bias (just noise):
 And here is a binby2 15-sec 300gpm flat (in 3 pieces to show more
dynamic range; from top to bottom, right, middle and left of the CCD):
And here is a binby2 15-sec 300gpm flat (in 3 pieces to show more
dynamic range; from top to bottom, right, middle and left of the CCD):
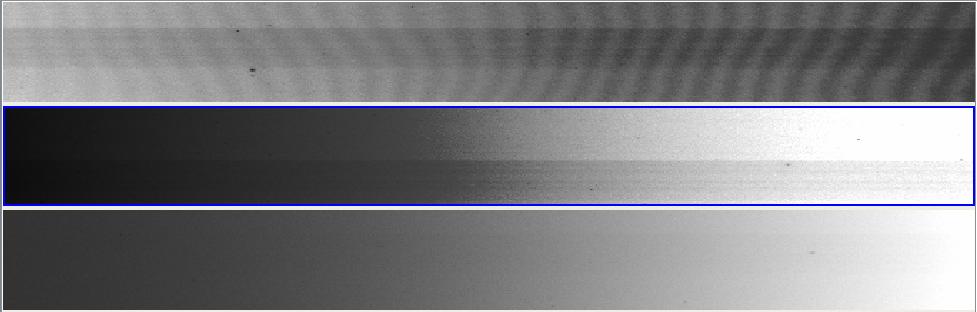 If the biases or flats look different to you from the images above, please
report that to the staff as soon as possible (call in the beginning
of the night, send email and describe in the log at the end).
2a. Measure the FAST focus once at the beginning of your run with
the standard (300 gpm grating) setup. Follow these instructions.
A good time to do it is in the afternoon, after darks, biases and
flats. For the 600 (1200) gpm grating, add 30 (100) focus units (thanks
to Warren Brown for the definitive numbers) to the best focus value
you measured for the 300 gpm grating.
2b. For FAST combo observing, make sure that the HeNeAr line at 7384A
is positioned at pixel 2660. See the printout to the left of the
whiteboard in the observing room. To fine-tune the tilt, one
step of the micrometer (see the FAST description for its location;
you must be trained in its use) moves the line by ~9 pixels.
Increase the micrometer reading to decrease pixel location.
3. Take darks in the afternoon and morning. Type "dodarkx2"
and/or "dodarkx4" in the Telshell for 5 binby2 and 5 binby4
900-sec DARK exposures (so each script takes about 75 minutes to
run. Good times are in the afternoon (assuming the chamber is not
in use) or in the morning after observations. Use cntrl-C to exit
a script.
4. Before sunset and once the darks are finished, fill the dewar and
record the fill in the log that is usually on the side of FAST or
in the control room in a conspicuous place. You can display fastlog.ps,
which contains the night's log with "ghostview" (usually aliased
as gv -orientation=seascape), after you cd to the night's directory.
5. At sunset open the dome. Go into the chamber and press the
"Open" button twice. This button is to your left as you enter.
6. Open the mirror covers. This is the knob to the left of the
south pier. You turn to "open" and release. The first 4 mirror
covers open; about 10 seconds later the other 4 do. Make sure
they are all open. If not, try "open" again. Remember to wait
about 10 seconds to see if anything happens. If not, close and
then reopen. If this relay box gets confused, wait 5 full
minutes and try again.
7. Start up IRAF with "ecl" or "cl" if you prefer; cd to qfast.
epar qfast and change the "Observation date", and leave with
":q". Qfast lives in the "procd" package "initlog" that includes
the logging scripts and is loaded automatically. Note that 2
options are available for the qfast parameter "Calibration file
name," depending on whether you are using the [300 gpm/600 tilt]
grating or the [600 gpm/440 tilt] grating, respectively,
"comp300+600" or "comp600+440."
8. Leave the rack and the TV gain down until you are ready to
observe an object. You can verify the focus of the spectrograph
in the meantime. Do an "splot" on the "COMP" exposure you just
took. Zoom ("a" and "a") in on the range near 2000 pixels. Mark
the beginning and end of the Gaussian-looking line profiles with
"k"; you want the FWHM to be below 4.1. If it's not, try again
these instructions and note any
change in the logs. You may want to adjust the Guide Rates of the
handpaddle from the "Rates" menu in the yellow window; I find a
value of 3 for both RA and dec to be fine (default is 0.5, which
is very slow).
9. Turn on the rack as follows: MAKE SURE the "RA" and "Dec"
indicators on the TCS-PC (right monitor) are solid blue and not
flashing red. If they are, then either hit the hot key on the
mount (to the right) PC keyboard (F9) (it is marked in red) or
click on "Stop" in the ntcs (yellow) window. Then go into the
back room and push button "2" on the rack. Wait about 5 sec for
the relay to click. Then flip switches "3" and "4" in that
order.
10. Turn on the telescope and dome tracking in the tcs window and
observe a velocity standard, such as NGC 7331; move the mirror
to "Sky". In the CCD window type "comment" and make the
appropriate changes. Then say "repeat 2 total 180"; this gives
you two 3-minute exposures. Guide the telescope by hand during
these exposures. Do a "cex" afterwards.
11. Find a star (not too bright) near the center of the guider field
of view. Press either button on the box labeled FOCUS (separate from
the handpaddle). You may need to go past a good focus (as compact a
star as possible) and return to obtain the optimal focus. The focus
system has a low and a high speed, controlled by a toggle switch near
the 2 buttons. The red LED readout next to the guider monitor shows
the position of the secondary relative to the primary; the numbers
increase as the secondary moves closer to the primary.
12. If the dome gets lost: from the ntcs window, open tele tasks and
click on Dome Init. Then turn dome track back on.
13. Do some of the smaller projects -- AGN monitoring, stars, etc.
Often they have specific standards they want for comparison, like
Massey standards, which should be indicated nearby. Generally
you want the standard for a given object to be near the object
itself in the sky. Also they will often want multiple exposures
(usually short -- a few minutes tops) of both the targets and the
standards. Remember to do a "cex" (TV gain down!) after each new
object (not each new exposure of the same object).
14. Observe! Normally, projects provide online
catalogs of all objects. These minimize errors and speed up operations.
15a. NOTE: check the observing instructions for each project to
see if you need to rotate to the parallactic angle. Note further
that to rotate, it is essential to be at or near the zenith!
NOTE: If you enter coordinates that are inaccessible, the
"Next" indicator on the right PC monitor will be red and the
telescope will not slew. So do some other object.
15b. To check an exposure for redshift, say "qf 161" (for instance) in
the red IRAF window, in the "qfast" directory there (see Appendix
1). To get a redshift (instead of just a spectrum), say
"quickred=yes". Type 'q' in the non-Tek IRAF window to achieve
the quick-reduction.
16. To stow the telescope and dome, click on "Stow All" in the ntcs
window; the tracking is also turned off by this action.
17. Close the mirror covers -- check visually that they all shut.
18. Close the dome and restart the A/C; leave fan on 'Auto'.
19. Turn off the rack in the order: switch 4, switch 3, button 2.
20. Source the standard bias+flat script again at the end of the night:
type "dobfx2x4-300"
21. Make the night's entry in the on-line observing report.
22. Fill the dewar and record the fill in the log.
If the biases or flats look different to you from the images above, please
report that to the staff as soon as possible (call in the beginning
of the night, send email and describe in the log at the end).
2a. Measure the FAST focus once at the beginning of your run with
the standard (300 gpm grating) setup. Follow these instructions.
A good time to do it is in the afternoon, after darks, biases and
flats. For the 600 (1200) gpm grating, add 30 (100) focus units (thanks
to Warren Brown for the definitive numbers) to the best focus value
you measured for the 300 gpm grating.
2b. For FAST combo observing, make sure that the HeNeAr line at 7384A
is positioned at pixel 2660. See the printout to the left of the
whiteboard in the observing room. To fine-tune the tilt, one
step of the micrometer (see the FAST description for its location;
you must be trained in its use) moves the line by ~9 pixels.
Increase the micrometer reading to decrease pixel location.
3. Take darks in the afternoon and morning. Type "dodarkx2"
and/or "dodarkx4" in the Telshell for 5 binby2 and 5 binby4
900-sec DARK exposures (so each script takes about 75 minutes to
run. Good times are in the afternoon (assuming the chamber is not
in use) or in the morning after observations. Use cntrl-C to exit
a script.
4. Before sunset and once the darks are finished, fill the dewar and
record the fill in the log that is usually on the side of FAST or
in the control room in a conspicuous place. You can display fastlog.ps,
which contains the night's log with "ghostview" (usually aliased
as gv -orientation=seascape), after you cd to the night's directory.
5. At sunset open the dome. Go into the chamber and press the
"Open" button twice. This button is to your left as you enter.
6. Open the mirror covers. This is the knob to the left of the
south pier. You turn to "open" and release. The first 4 mirror
covers open; about 10 seconds later the other 4 do. Make sure
they are all open. If not, try "open" again. Remember to wait
about 10 seconds to see if anything happens. If not, close and
then reopen. If this relay box gets confused, wait 5 full
minutes and try again.
7. Start up IRAF with "ecl" or "cl" if you prefer; cd to qfast.
epar qfast and change the "Observation date", and leave with
":q". Qfast lives in the "procd" package "initlog" that includes
the logging scripts and is loaded automatically. Note that 2
options are available for the qfast parameter "Calibration file
name," depending on whether you are using the [300 gpm/600 tilt]
grating or the [600 gpm/440 tilt] grating, respectively,
"comp300+600" or "comp600+440."
8. Leave the rack and the TV gain down until you are ready to
observe an object. You can verify the focus of the spectrograph
in the meantime. Do an "splot" on the "COMP" exposure you just
took. Zoom ("a" and "a") in on the range near 2000 pixels. Mark
the beginning and end of the Gaussian-looking line profiles with
"k"; you want the FWHM to be below 4.1. If it's not, try again
these instructions and note any
change in the logs. You may want to adjust the Guide Rates of the
handpaddle from the "Rates" menu in the yellow window; I find a
value of 3 for both RA and dec to be fine (default is 0.5, which
is very slow).
9. Turn on the rack as follows: MAKE SURE the "RA" and "Dec"
indicators on the TCS-PC (right monitor) are solid blue and not
flashing red. If they are, then either hit the hot key on the
mount (to the right) PC keyboard (F9) (it is marked in red) or
click on "Stop" in the ntcs (yellow) window. Then go into the
back room and push button "2" on the rack. Wait about 5 sec for
the relay to click. Then flip switches "3" and "4" in that
order.
10. Turn on the telescope and dome tracking in the tcs window and
observe a velocity standard, such as NGC 7331; move the mirror
to "Sky". In the CCD window type "comment" and make the
appropriate changes. Then say "repeat 2 total 180"; this gives
you two 3-minute exposures. Guide the telescope by hand during
these exposures. Do a "cex" afterwards.
11. Find a star (not too bright) near the center of the guider field
of view. Press either button on the box labeled FOCUS (separate from
the handpaddle). You may need to go past a good focus (as compact a
star as possible) and return to obtain the optimal focus. The focus
system has a low and a high speed, controlled by a toggle switch near
the 2 buttons. The red LED readout next to the guider monitor shows
the position of the secondary relative to the primary; the numbers
increase as the secondary moves closer to the primary.
12. If the dome gets lost: from the ntcs window, open tele tasks and
click on Dome Init. Then turn dome track back on.
13. Do some of the smaller projects -- AGN monitoring, stars, etc.
Often they have specific standards they want for comparison, like
Massey standards, which should be indicated nearby. Generally
you want the standard for a given object to be near the object
itself in the sky. Also they will often want multiple exposures
(usually short -- a few minutes tops) of both the targets and the
standards. Remember to do a "cex" (TV gain down!) after each new
object (not each new exposure of the same object).
14. Observe! Normally, projects provide online
catalogs of all objects. These minimize errors and speed up operations.
15a. NOTE: check the observing instructions for each project to
see if you need to rotate to the parallactic angle. Note further
that to rotate, it is essential to be at or near the zenith!
NOTE: If you enter coordinates that are inaccessible, the
"Next" indicator on the right PC monitor will be red and the
telescope will not slew. So do some other object.
15b. To check an exposure for redshift, say "qf 161" (for instance) in
the red IRAF window, in the "qfast" directory there (see Appendix
1). To get a redshift (instead of just a spectrum), say
"quickred=yes". Type 'q' in the non-Tek IRAF window to achieve
the quick-reduction.
16. To stow the telescope and dome, click on "Stow All" in the ntcs
window; the tracking is also turned off by this action.
17. Close the mirror covers -- check visually that they all shut.
18. Close the dome and restart the A/C; leave fan on 'Auto'.
19. Turn off the rack in the order: switch 4, switch 3, button 2.
20. Source the standard bias+flat script again at the end of the night:
type "dobfx2x4-300"
21. Make the night's entry in the on-line observing report.
22. Fill the dewar and record the fill in the log.
APPENDIX 1
----------
A. Windows on flwo60 --there are 5. 1. IRAF window 2. Telshell
window. Do "total 600", "comment", "dirs", "dlink", "cex"
and so on from here. 3. NTCS window -- yellow. This is where
you control the comp mirror, the lamps, enter new coordinates,
slew or stow the telescope, and so on. 4. Fast.err -- small,
white. Tells you what's going on. You do nothing with it other
than look at it to 5. Finders -- this is a version of ds9 with
another name. As you process new coordinates with tcs, a finder
chart will automatically be retrieved from dsseso. If you
mistakenly exit this window it can be restarted with the command
"dofinders". Once in a great while the eso server may not be
available, due to network or other problem. This can cause the
RT system to hang awaiting a chart. In that case, exit the
finders window. Then run finders_dssstsci, which will open a window
connected to stsci. Then run dofinders and finders will then
fetch new charts from the Stsci servers. If eso comes back later
you can exit the finders window, and run finders_dsseso and switch
back. Another dofinders and charts will be coming from Eso.
In the case of a network problem exit the finders window and use
the printed charts!
B. You can use vncviewer to see what the CCD is doing, for
instance. Use the command vncviewer ccd60:2. The password is the
same as the flwo60 observer account. If there is a problem,
you may be asked to report its contents.
C. If something goes awry:
1. To interrupt an exposure, in the CCD window say abort
2. To get rid of a file use the rm command, again in the CCD window.
3. If you did a bad repeat command, to stop that say "abort".
D. Getting the headers right.
1. You enter the new coordinates from the ntcs (yellow) window.
- from a catalog: load the catalog by saying "newcat whatever.mct"; it
knows in which directory to look. Select an item by its sequence
in the catalog with "#23", or by name with "!M31" or "!awm7_2.002".
- by hand -- type in the RA and Dec and epoch with fields separated
by spaces; remember to update the object using the object command.
2. If the next target came from a catalog, you're set. Just say
"total 300" in the CCD window.
3. If you are entering coordinates by hand, you have to update
using object as well. Always do this before you start the exposure,
Then you can say "total 300" to start exposing.
E. IRAF directories and qfast
There is a "/home/observer/qfast" directory where you may use
"qfast" (or just "qf"). That helps, because qfast generates a
lot of ancillary files that you don't want in your data directory
(e.g., /fast/2010.1003). Toggle between the "qfast" and "[date]"
directories with "back". You need to be in the data directory to
do splots. Use "view" (Ds9 of the whole chip) from the CCD
window. The various programs (view, q, splot) differ in terms of
what argument they take. "qfast" and "view" require only the
number of the exposure (i.e. "qfast 67") whereas "splot" needs
the full file name (if you use ecl, type the number, e.g., 0035,
and then a tab will fill in the rest).
There are valid wavelength solutions (300 and 600 gpm) already
created for FAST quicklook (qfast). The key to making this work
is to make sure the following files are in place, and that they
are referenced properly from qfast, and that you operate qfast
only from the directory where you have the files (the trash
directory).
The example below is for the observer account, the one to use unless
you are Perry or Mike.
You may also create your own wavelength solution; notes on doing that
and a HeNeAr atlas are in the blue FAST notebook by the stereo.
epar qfast in IRAF to look like the following (binby4 in this case):
PACKAGE = procdata
TASK = qfast
nobs = 61 FAST image number to process
(rootdir= /fast/) Spectrum image root directory
(obsdate= 2010.1004) Date of observation directory (yyyy.mmdd)
(fcal = comp300+600) Calibration file name
(caldir = /home/observer/qfast) Calibration image directory
(row1 = 10) First row for spectrum search
(row2 = 70) Last row for spectrum search
(keepnam= yes) Keep object name in file name (y or n)
(apdisp = yes) Display aperture and background (y or n
(imdisp = no) Display raw image (y or n)
(spdisp = yes) Display spectrum (y or n)
(quickre= no) Find redshift (y or n)?
(delquic= yes) Delete quick-look 1-D spectrum (y or n)?
(verbose= no) Log progress (y or n)?
(flpar = no) flush pfile on assign?
(mode = ql)
Run qfast only from the /home/observer/qfast directory (essential!).
Make sure the following files are in place:
/home/observer/qfast/
comp300+600.ms.fits
comp600+440.ms.fits
/home/observer/qfast/database/
idcomp300+600.ms
idcomp600+440.ms
Extra copies of all of these files are stored in the /home/falco/qfast
directory.
Note that qfast creates extra ap* files in the
/home/observer/qfast/database/ directory as the night goes on,
you may ignore or delete these.
qfast problems:
If "q" is ambiguous, type "procd"
If qfast says id* file not found in the trash directory, you are probably
not running qfast from /home/observer/qfast.
pr> q 130 row2=150
QFAST: Calibration file idcomp300+600.ms not in /home/observer/qfast
pr> pwd
/home/observer
pr> cd qfast
pr> q 130 row2=150
[0130.SN1996boq.ms] refspec1='comp300+600.ms'
pr> q 46
ERROR on line 202: ambiguous task `refspec'
qfast (nobs=46)
try exiting iraf, cd to home, and re-start iraf with ecl, then cd
to qfast
** To get quick redshifts, say quickred+, or epar qfast and turn on
quickred. Then epar xcsao, and make it look for the template directories
in /home/perry/template . Look there to see what the template names
are, and then when it asks you which ones to use, you can tell it.
F. It is possible to the change the integration time on the fly.
If you want to extend the exposure longer, use the extend [n] command
to add n more seconds to the current exposure. If you wish to stop
a current exposure use the istore command to stop it now and store
the integration. Or if you wish to stop and discard it just use
the abort commad.
G. It is possible to update the telescope coordinates if it is
consistently off. Move it by hand to where it should have
gone, then on the right PC keyboard, say "Alt =", then "y".
I. How far to drive the telescope?
To the West: HA of 3.5 hours; up to 4 if dec is around 30.
East: HA of 3 hours
If your command window is still responsive, type "exit" there. When all the tcs-related windows have vanished, type "gofast". If it will not respond you can try killing this window using the X at the top. Let system go away then retry gofast.
If none of the above works, it's probably necessary to reboot flwo60 and start over. If you do that, you might as well go through the whole telescope startup routine again.
If you get into bad trouble, for example the screen locks up on you and you get no response for several minutes, you will have to reboot the system. You may also have to do this to restart after being shutdown because of maintenance work or power problems.
                                    APPENDIX 2
                                    ----------
Created: Susan Tokarz 08/20/01 Updated: Nathalie Martimbeau 04/05/06 Updated: 10/03/10 by EF
The following protocols have been established for taking data using the FAST spectrograph. Their purpose is to make automatic reduction possible while maximizing the quality of the spectra.
The standard set-up is:
300 gpm gratingUnless otherwise indicated, this setup is assumed for the exposure times we mention below.
3" slit
binby2 (binby4 may also be used)
The standard method to enter object names and coordinates into the telescope control system for ALL observations is through a catalog. If there is a request for Director's Discretionary Time, please add the observation to catalog prog099.mct, for program 99, and use this catalog. The catalog method ensures that correct program numbers and PI names are inserted in all image headers, which is essential for our pipeline processing.
        FLATS   BIASES  DARKS
binby2   15       10      5
binby4   10       10      5 (if needed)
Doug Mink wrote qfast, an Iraf script that allows you to quickly (and roughly) reduce your spectra for a look at the telescope. It produces a plot of the 1-d wavelength-calibrated spectrum, calculates a velocity and marks the absorption and emission lines for that velocity. Note that there are wavelength-calibration files for the 300 gpm/600 tilt (comp300+600.ms) and 600 gpm/440 tilt (comp600+440.ms) gratings. Thus, you should be able to determine whether you have a sufficiently high SNR for a reliable velocity measurement. Although the R value can be used as a rough guide (the higher, the better), you should be able to see for yourself that, e.g., the Mg and Na lines are believable and that emission lines, if present, are clearly real and not noise spikes or cosmic rays.